Checkouts

You can only modify objects that you have checked out. All the objects that you have inserted to the model are checked out to you until you check them in.
You can easily see the checkout status of all the objects in a shaded work view if you set the view to be colored according to owner: right-click the work view and select 3D-digitize > Object colors > Color by owner from the context menu, or press Alt+5. See Status colors for details.
Note that a model object might belong to one or more Groups, and normally a checkout operation will automatically include the associated Groups. In some situations, you might need to perform a checkout specifically on a Group, and you can do this by selecting Select by group (G) from the context-menu. For more information, see Selecting groups and their members.
Check Out
Check out objects to be able to modify them. When a model object is attached to a 3D Space object (Service Space, Cable Way Space), the check-out operation is automatically applied to both.
Prerequisites
- If the objects are checked out by another designer, ask that designer to check in the objects.
- If you are working in a distributed project and the objects are checked in at another site, you must request the ownership of the objects. Then you can load updates to your site and check out the objects. See Ownership.
- Access rights allow you to check out the required objects. See Set model area access rights and save.
Do the following:
-
On the Model tab, in the Checkouts group, select Check Out.
-
Select the objects you want to check out, and press Enter.
-
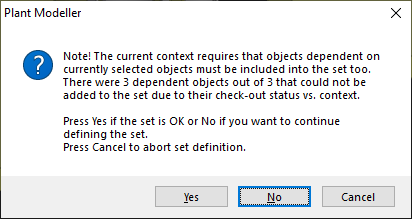
You are prompted if the selected objects have dependent objects that should also be checked out but the program could not add them into the set. Select how to proceed:
- Yes – Check out the objects that can be checked out.
- No – Go back to selecting objects.
- Cancel – Cancel the checkout operation.
-
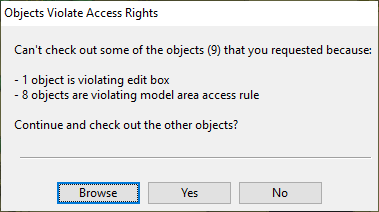
You are prompted if the selected objects are not inside the area where you are allowed to make changes or are not included in the access rule you are using. Select how to proceed:
- Browse – Open the Objects Violating Access Rights view to show the problematic objects.
- Yes – Check out the objects that you are allowed to modify.
- No – Cancel the check-out operation.
Cancel Check Out
You can cancel checkouts if you want to discard any changes you might have made to objects after the last time you updated your changes to COS.
This operation does not affect any new objects that you have inserted to the model but have not updated to COS.
When a model object is attached to a 3D Space object (Service Space, Cable Way Space), the cancel operation is automatically applied to both.
Do the following:
-
On the Model tab, in the Checkouts group, select Cancel Check Out.
-
Select the objects whose checkout you want to cancel, and press Enter.
The Handle canceling of check out of objects dialog opens for selecting how to proceed.

-
You can do the following:
- Browse – Show the selected objects in a preview window.
- Save MDL – Save the selected objects in an *.mdl file.
- Ok – Accept the canceling operation. Any changes made after you last updated the selected objects to COS will be discarded.
- Exit – Close Plant Modeller and postpone the decision to the next time you open the application.
-
If you selected Ok to continue the operation, you are prompted that the objects in the COS database and in your model have differences. Select Yes to retrieve the last saved version of the objects from the server.

Check In
Check in objects to allow others to modify them.
When a model object is attached to a 3D Space object (Service Space, Cable Way Space), the check-in operation is automatically applied to both.
Do the following:
-
On the Model tab, in the Checkouts group, select Check In.
-
Select the objects you want to check in, and press Enter.
-
You are prompted if the selected objects have dependent objects that should also be checked in but the program could not add them into the set. Select how to proceed:
- Yes – Check in the objects that can be checked in.
- No – Go back to selecting objects.
- Cancel – Cancel the check-in operation.
Alternatively, you can check in all the objects that you have checked out or inserted to the model:
-
Select File > Save.
-
In the Save dialog, select the options Update COS database and Check-in all objects, and then click Save.
If there are some objects that you have checked out but not modified, the checkout of these objects is canceled and their modification time will not change.
Note: The Check In and Save commands do not check in any documents. Documents must be checked in separately.
Selecting objects for check-in or check-out
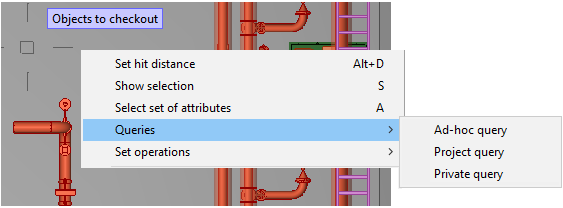
There are different ways to select objects for a check-in or check-out, but one very flexible way is to use advanced queries. You can right-click a view and select Queries from the context menu, and then select the kind of query to use.
If you select a model object that is attached to a 3D Space object (Service Space, Cable Way Space), also the 3D Space object gets selected, and the other way round.
See Advanced queries for details.